If your Thermador oven shows Error Code E012, it points to a problem with the electronic control board’s temperature sensor. That sensor tells the oven what the internal temperature is, so when it fails you can get inaccurate temperatures, uneven cooking, or the oven may refuse to heat. This guide explains the problem in plain American English, walks you through the likely causes, gives safe DIY checks and repair steps, and lists preventative maintenance tips to keep this from happening again. The structure alternates detailed paragraphs with short lists for actions — easy to read and optimized for search queries like Thermador oven error E012, E012 Thermador, Thermador temperature sensor failure, and fix Thermador E012.
Quick overview — what E012 really means
Thermador’s E012 code is a diagnostic flag: the oven’s control electronics detect that the temperature sensor (sometimes referred to as the oven probe or NTC sensor) is providing readings outside the expected range or not responding at all. The sensor is usually a thin probe inside the oven cavity connected by wires to the control board. If the board gets an open circuit, a short, or wildly incorrect resistance readings from that sensor, it throws E012 to prevent unsafe operation. In short: the oven cannot trust its temperature readings, so it warns you.
A failing temperature sensor will affect bake consistency, broil accuracy, and can make programmed recipes unreliable. Early detection and a methodical approach can often save a repair bill and get the oven working properly again.
Common causes of E012
- Failed temperature sensor (open or out-of-spec resistance)
- Damaged wiring or poor connector at the sensor or control board
- Corrosion at terminals caused by humidity or steam exposure
- Faulty electronic control board that misreads a good sensor
- Physical damage to the sensor from impact or cleaning with abrasive chemicals
Understanding these causes will help you narrow down whether the problem is a cheap sensor swap, a wiring fix, or a board replacement.
First checks you can do safely (before any disassembly)
Unplug the oven or switch off the circuit breaker before touching anything. Never work on powered appliances. Start with simple, non-invasive checks that solve many E012 cases quickly.
- Confirm the code appears consistently (does it show only sometimes or every time you power on?).
- Check for obvious signs of damage around the control panel and inside the oven cavity.
- Smell for burned electronics — a burnt odor near the control area indicates a failed board.
- Note any recent events: power surge, spill, service work, or self-clean cycle that preceded the error.
These basic observations help decide whether you proceed with a DIY sensor check or call a pro.
How the temperature sensor works (short technical explanation)
The temperature sensor is typically an NTC thermistor — a resistor whose resistance changes predictably with temperature. The control board applies a small current, measures the voltage drop, and converts that into a temperature reading. If the measured resistance is far from the expected value at room temperature (usually in a specified ohm range), the board assumes the sensor is bad and throws E012. If the wiring is shorted or open, the board sees an impossible reading and also triggers the error.
Knowing this helps when you use a multimeter to test resistance: you’re not guessing — you compare measured ohms to expected manufacturer specs.
DIY diagnostic steps (minimal lists, practical)
- Power off the oven and disconnect it from the mains.
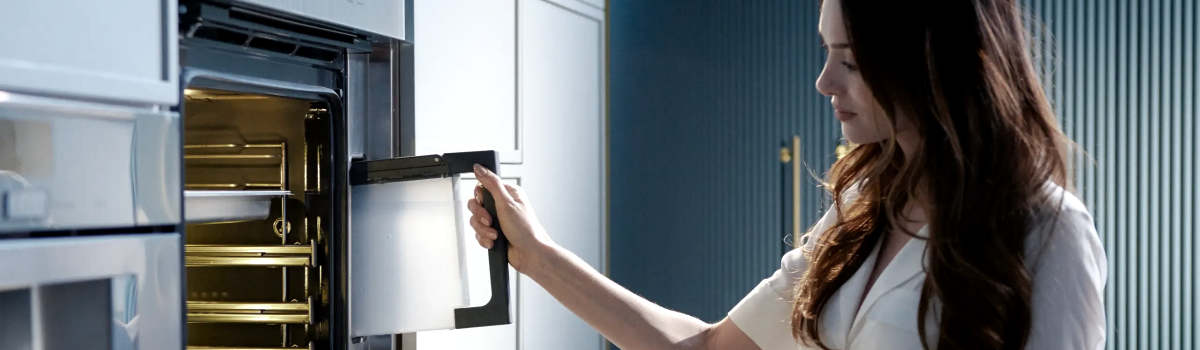
- Locate the temperature sensor: it’s usually inside the oven cavity, near the top or back wall, held with two screws.
- Access the sensor connector — either inside the control panel or where the sensor cable enters the oven body.
- Use a multimeter set to ohms. At room temperature, most oven thermistors read between roughly 1kΩ and 10kΩ depending on model; check Thermador specs if possible.
- If the resistance is open (infinite) or zero (short), the sensor is bad. If the resistance is wildly off from the expected room-temp value, replace the sensor.
- Inspect the sensor wiring for breaks, chafing, or loose connectors. Repair or re-seat connectors as needed.
- After replacing or reseating, restore power and test the oven with a basic bake to confirm the code is gone.
These steps solve many E012 problems. If the sensor reads normal and wiring is good, the control board may be at fault.
How to replace the temperature sensor — practical DIY guide
Replacing the sensor is a common and usually affordable repair if you have basic tools and comfort with light appliance work. Always power off and verify no voltage at the unit first.
- Remove the oven racks and open the cavity to access the sensor screws.
- Unscrew the sensor from the oven wall and gently pull the sensor lead into the cavity following the cable path.
- Find the sensor’s connector (often behind the control panel). Unplug it by releasing the clip — avoid pulling wires, pull the connector housing.
- Fit the new sensor: plug into the connector and secure the probe back to the cavity wall with original screws.
- Restore power and run a test cycle. Verify accurate temperature with oven thermometer if available.
If the control board connector looks burned or the connector pins are loose, replace the connector or the harness, or get a technician to inspect the board.
When the control board is the culprit
If your sensor checks out (correct resistance, solid wiring) but E012 persists, the control board’s sensor input or the board firmware may be malfunctioning. Control boards can fail after power surges, water ingress, or component aging. Signs of a board failure include intermittent fault codes, display glitches, or the board getting unusually hot.
Diagnosing a board fault usually means:
- Visual inspection for bulging capacitors, burned resistors, or damaged traces.
- Checking voltage regulators and sensor input circuits (requires electronics knowledge).
- Ultimately replacing the control board if components near the sensor input are confirmed faulty.
Because control board replacement is more complex and costly than a sensor swap, many users opt for a certified technician to confirm the board is bad before buying an expensive part.
Practical troubleshooting examples (real-world scenarios)
A few typical cases seen by technicians:
A homeowner reported E012 after a steam cleaning accident in the kitchen. The sensor connector showed corrosion; cleaning and replacing the connector fixed the code.
Another case: the oven had intermittent E012 only after heavy roasting. Multimeter testing showed the sensor resistance fluctuating with no physical movement — the sensor was failing under heat and required replacement.
One technician found a cracked sensor element after inexperienced users used abrasive cleaners inside the oven — physical damage led to erratic readings and the E012 code.
These examples show the most common paths from symptom to fix: moisture/corrosion, heat-induced sensor failure, or physical damage.
Safety and tips for buying replacement parts
Always buy OEM or certified parts matched to your Thermador model. Generic parts may physically fit but have different resistance curves that cause inaccurate readings. When ordering, use the oven model number and serial number. Replace fasteners and harness clips with the originals; using wrong screws can damage the cavity lining or create poor sensor seating.
If you are unsure about testing with a multimeter, or if the sensor location is hard to access on your model, call a technician. Safety first.
Preventive maintenance to avoid E012 and extend oven life
Small maintenance habits prevent many sensor-related errors:
- Wipe away spills promptly and avoid spraying liquid into control areas.
- Don’t use abrasive chemicals inside the cavity that can damage sensor probes.
- Keep the oven door seals intact to prevent steam and grease from entering the control area.
- Periodically inspect the sensor and wiring visually for signs of wear or corrosion.
- Use a plug-in surge protector for kitchen appliances where reasonable; power surges can damage control electronics.
Regular care extends the life of both the sensor and the control board.
When to call a professional
If you’ve tested the sensor and wiring and E012 remains, or if you’re not comfortable working with the oven’s electrical components, call an authorized service technician. Ask them to:
- Verify sensor resistance at room temperature and at temperature if needed.
- Inspect the control board and connectors for damage or corrosion.
- Perform measured diagnostics rather than replacing parts blindly.
A professional will also ensure replacements are genuine Thermador parts and will validate oven calibration after repair.
Final notes on diagnostics and SEO-friendly phrases
To help your search and article ranking, these are the keywords and phrases covered here in natural language: Thermador oven error E012, E012 Thermador, Thermador oven temperature sensor failure, fix Thermador E012, and Thermador not heating correctly. Use an oven thermometer to confirm repair success and record any intermittent behavior when you contact support or a technician.